Change employee data
Within the administration of your company, employee data may need to be edited at some point. You can edit the employee’s personal information, roles, department, or manager.
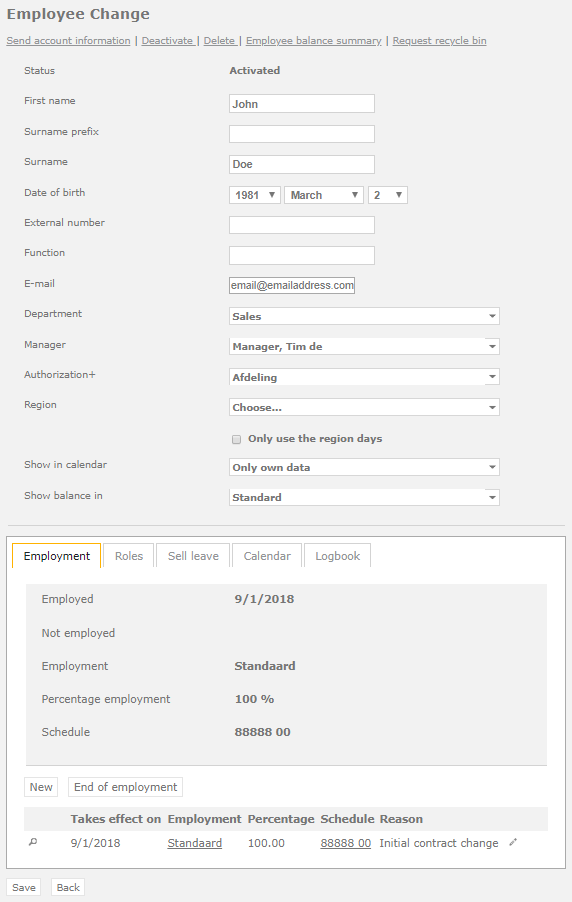
You can find the edit employee screen by going to ‘Settings (gear icon top right)’ ⇒ ‘Users’ ⇒ ‘Overview’ in the menu on the left, and selecting the pencil icon next to the employee in question. The following screen will appear:
Manage account
- Send account information: When the user’s status is activated, this option will be available. This enables you to send the user their login details, which are the email address and username chosen by the user themselves in the registration.
- Send activation: When the user’s status is new, this option will be available. This sends the user an email with an activation link.
- Send activation again: When the user’s status is pending activation, this option will be available. This sends the user a new email with an activation link. In case the activation link has expired, the account will need to be deactivated and reactivated anew.
- Reactivate: When the user’s status is deactivated, this option will be available.This sends the user a new email with an activation link. In case the activation link has expired, the account will need to be deactivated and reactivated anew.
- Deactivate: This deactivates the account, so that the user will no longer have access to the application. This is the final step in ending an employment. As administrator you will retain access to the history of this user, but it will no longer take up a licence. In case the employee returns to employment, the reactivation can easily be accomplished, and will grant the employee access to their leave history. To do this, select Reactivate.
- Delete: This option will delete the user/employee (including their leave history and summary of the employee) from your administration.
- Employee balance summary: This option reveals the full leave history and summary of the employee.
- Request recycle bin: Requests that were deleted by an administrator can be viewed, restored, or deleted permanently here.
Change employee data
To edit the user data of the employee, stay in this screen. Here, you can edit the following data:
- Status: Here you can see the status of the account.
- First name: Can be changed if necessary.
- Surname prefix: Can be changed if necessary.
- Surname: Can be changed if necessary.
- Date of birth: Can be changed if necessary. The calculation of senior days is based on this date, so make sure it is the correct one.
- External number: Here, you can change the employee number, if your company uses those.
- Function: You can edit the employee’s function here.
- E-mail: You can edit the employee’s e-mail here.
- Department: You can change the employee’s department to another one that has been added to the system.
- Manager: You can change the employee’s manager here. This should be done when a new employee will become a manager, or when the employee has changed departments. Select the drop-down bar to select the desired manager. Only employees with the manager role will be shown in this menu. If this person does not have a manager, he will select his or her own name. He will then take care of his own requests. For other manager options, go to the user or the manager tab.
- Authorization+ (module): Select the authorization flow that should apply to the request process of this employee. The dropdown menu will contain all authorization flows that are linked to the type of leave ‘all’.
- Region: Here, you can add an employee to a different region, in case this needs to be changed. Select the option ‘only use the region days’ if you are not using the standard special days for this employee. If you do want these to count, including the selected region days, leave the box unchecked.
- Show in calendar: This option allows you to select which employees will be shown in the current employee’s calendar. It is possible to choose between showing the employees of a certain department, all employees, or only him- or herself. Use this option when it is important for the employee to see other employees’ requests in the calendar. This way, he or she can plan requests at the right moment. For some clients, this option will still be in another tab called
- Show balance in: The balance can be shown in different ways. When the setting ‘standard’ is used, the settings of the employment will be applied. We advise you to leave it as ‘standard’ so that everyone at the company will work with the same calculations.
Don’t forget the click ‘Save’ after making any changes, so that the changes can be applied.
The employment tab
Here, you can change the employment of the employee. Thus, you can change the amount of leave days the employee will get. So if the employee’s contract changes, implement the changes here.
Read more about changing an employee’s contract here.
The manager tab
This tab is only visible when you are editing an employee with the manager role.
When you select the ‘Manager’ tab, the following screen will appear:
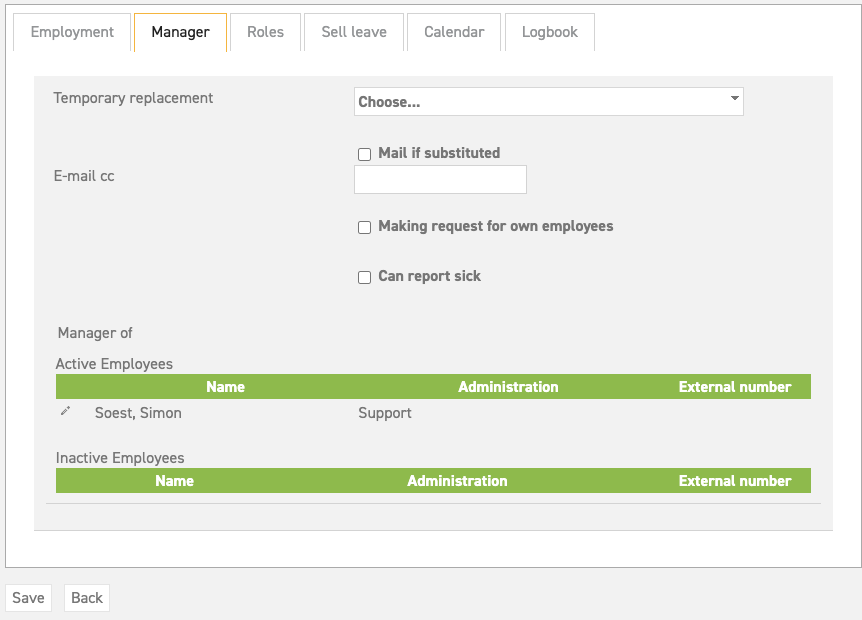
Here you can see that there are some extra options for editing the data regarding employees who are managed by this manager.
- Temporary replacement: Select another employee with a manager role if it is necessary that the user is replaced temporarily. Immediately after this option is selected, the rights of the current manager will be transferred to the selected manager. This means that the selected manager will assess the requests of the employees of the manager who is replaced. This should be used when a manager is temporarily absent, for instance during a holiday. Read more about appointing a temporary replacement, and what it entails, here.
- Mail if substituted: When you check this box, the original manager, who has temporarily gotten replaced, will also be notified via e-mail when his/her employees request leave, report sick, etc. This way, the absent manager will still be kept up to date during his/her absence.
- E-mail cc: Enter the e-mail address of someone who also has to receive e-mails of incoming requests of the employees of the manager in question.
- Making request for own employees: When you check this box, the manager will be able to request leave for his/her employees. The manager will be able to select certain employees to whom the request will apply when making a request. It is up to you to decide whether the manager will be authorized to do this.
- Can report sick: When this box is checked, the manager can report his or her employees sick. Read more about sick reports here.
The Roles tab
When you select the Roles tab, the following screen will appear:
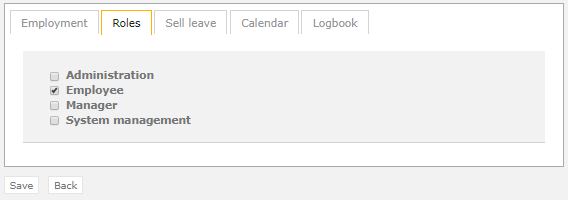
- Roles: It is possible that an employee will switch roles. In this case, you can change the role(s) here. It is possible to give employees multiple roles. Read more about employee roles here.
The sell leave tab
This tab will only appear when you have the module for selling leave. Select who can sell leave here. The manager is selected as the default option for this.
The calendar tab
This tab will only appear when you are using the module customized calendar in this administration. Read more about using a customized calendar here.
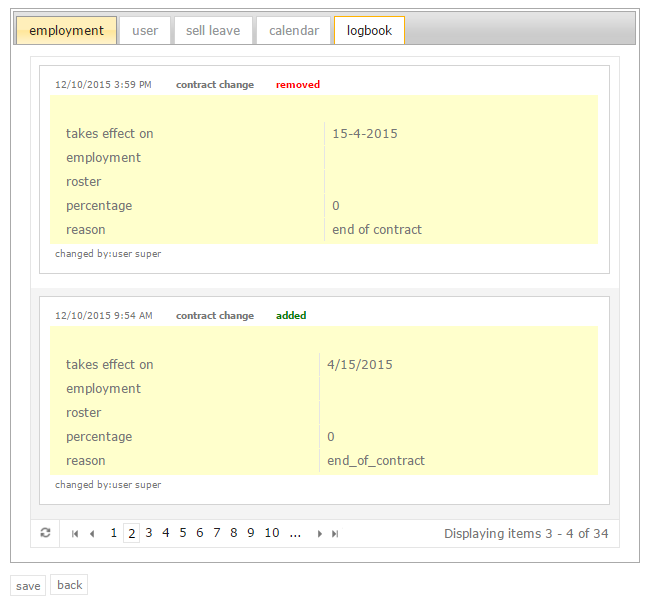
The logbook tab
Every contractual change that has occurred will be recorded in a logbook. Thus, it is always possible to see who implemented a change, when this happened, and why. Deleted contract rules will also be recorded here. The image below shows that all contractual changes have been documented.