Click here to read more about leave requests.
Click here to read more about assessing sell leave requests.
Click here to read more about the outstanding requests overview.
You could also use the App to assess requests.
Requests to be assessed
This menu item is only visible to employees with the manager role.
When you have been assigned the role of manager in the system, you can approve, reject, and change the requests of your employees.
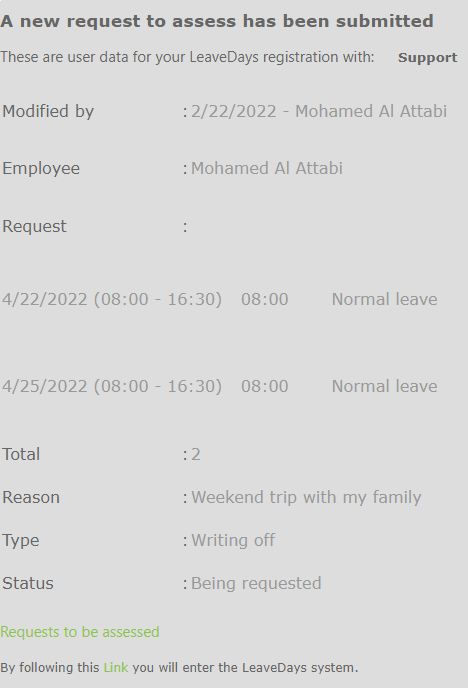
Requests can be assessed by going to the menu item ‘Leavedays (module at the top)’ ⇒ ‘To approve’ ⇒ ‘Leave (and overtime)’. You may also receive an email notification informing you of a new request awaiting assessment.
In either case, the following screen will appear:
The requests that still have to be assessed are shown at the top of the screen. Underneath, you will find the calendar. The calendar overview helps you in assessing the requests. This way, you can instantly gain insight into the capacity utilisation of the departments.
When you select a request, the calendar will show a coloured box for the date and employee in question. You can select multiple requests at a time. More information about the calendar can be found in the calendar summary.
- Employee/type of leave; This column shows information about the employee who has made the request, and for which type of leave the request is for.
- Period/reason; This refers to the period the request refers to. Underneath that, the reason for requesting leave is shown, if it was added by the employee.
- Balance; This is the balance the employee still has for the type of leave for which he has made a request. This is the balance after the current request has been deducted.
- Minus/plus; This is the amount of leave that was requested. This amount has already been deducted from the balance; in case the request is rejected, the balance will be restored.
Assess a request.
Next, the manager who is assessing has three possible ways to assess the request, according to the situation.
- Situation 1: the request has to be approved; Check the box of the request you wish to approve. The calendar will then show the request of the employee in the calendar in the predetermined colour. Then select ‘approve’. In case you wish to add a remark to this request, you can add it in the pop-up that appears in the text box marked ‘remark’. If the remark should only be visible for managers, add the remark to the box below, marked ‘only for managers’. Then select ‘OK’ to approve the request.
- Sitation 2: the request should be rejected; Follow the same steps as for situation 1, but select the option ‘reject’. It is mandatory to add a remark when rejecting a request,. The employee will be notified by email.
- Situation 3: the request should be approved partially, but also partially rejected; In this case, you should select the request in question. Select ‘reject’ and add a remark about the changes that are necessary. The employee will then have to change the request, or make a new one, and then have it be assessed anew by you, as the manager. You will receive a new email of this.
You could also use the App to assess requests.
Click here to read more about leave requests.
Click here to read more about assessing sell leave requests.
Click here to read more about the outstanding requests overview.


