The calendar summary
How does the calendar work?
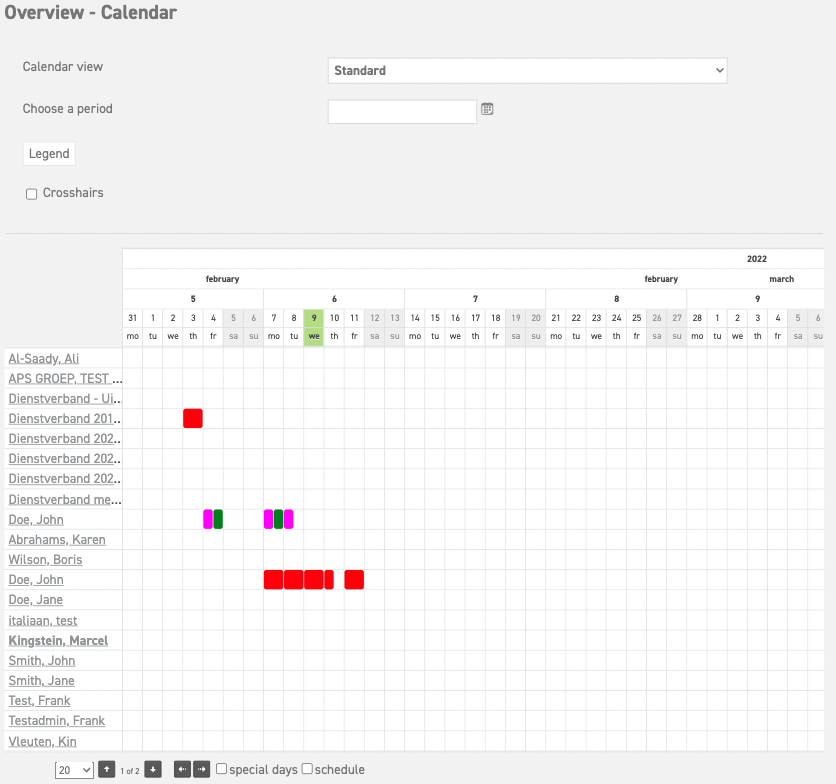
Above the calendar you can select the group of employees that you want to see in the calendar. Here you can also select the date or period of time, by clicking on the little agenda icon. The calendar overview will show the surrounding period of time.
The calendar summary shows the different requests with the different types of leave, in the colours appointed by the administrator to each type of leave. You can click on the legend to see which colour represents which type of leave, and the corresponding status.
To the left of the calendar summary, the names of all employees included in the selected calendar summary are displayed in alphabetical order. By default, up to 20 employees are shown; however, this number can be adjusted up to a maximum of 100 by clicking the number in the bottom-left corner.
The calendar will load without the special days (national holidays). Though, it is possible to see these, by ticking the little box at the bottom. Schedule days are shown in grey, and special days and non-working days are shown in white.
At the bottom left of the calendar, you can use the arrows to navigate:
-
Use the left and right arrows to move to the previous or next week.
-
Use the up and down arrows to scroll through the list of employees.
Printing the calendar
If you have the desire to print the calendar, you risk working with outdated data, since new requests can be added anytime. Click the “Print” button on the upper right in the calendar overview to print the currently selected calendar.


