Enter collective leave days into the system
Some companies apply collective leave days, such as a mandatory day off the day after Christmas or ascension day. The employees will have to use their own balance for this type of leave. It is possible to enter these leave days in a different way than using ‘special days’.
In order make a collective request, go to ‘Leavedays (module at the top)’ ⇒ ‘Leave’ ⇒ ‘Request collectively’ in the menu on the left. Here you can select whether you want to request this leave day for the entire company, or for a selected department. Select the type of leave from which the balance will be used. Select the day in the calendar, and fill out the reason for the collective request.

The time you have to fill out for this request has to cover all the schedules of the working day. Fill in the earliest starting time of all the schedules, and the latest ending time. If you would fill out 08.30 – 17.00 for example, while there is an employee who works until 18.00, it would seem that this employee would still have to work one hour that day. So be sure to use the earliest starting time, and the latest ending time of all of the schedules of that day.
Save the request. The request does not have to be assessed, since it is the administrator who submitted the request in the first place. The leave is processed right away.
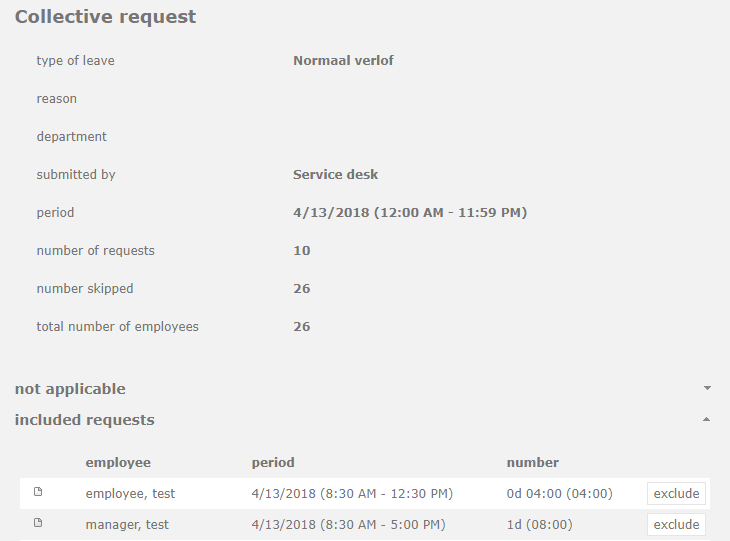
In order to see which employees are included in the request, go to ‘Leavedays (module at the top)’ ⇒ ‘Overview’ ⇒ ‘Collective requests’. Here you can see all collective requests.

By selecting the detail of the collective request, you will be able to see which employees are included in this request. The system will also show you how many employees have been skipped for this request. This is the case for the employees that had already submitted a request for that specific day, or are not scheduled to work that day.
When new employees are added to the system, the existing collective leave days will automatically be registered for them as well, if they are on the schedule for that day.
Solving a conflict
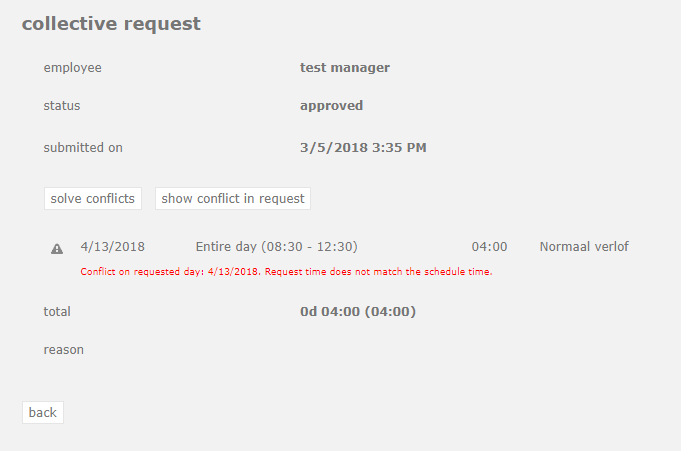
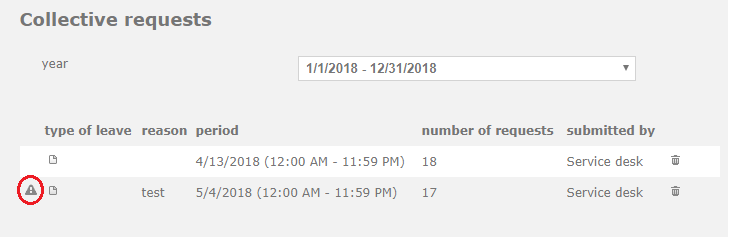
When you see this exclamation mark in front of a request, it means that this request has a conflict which needs to be solved according to the analyzer.
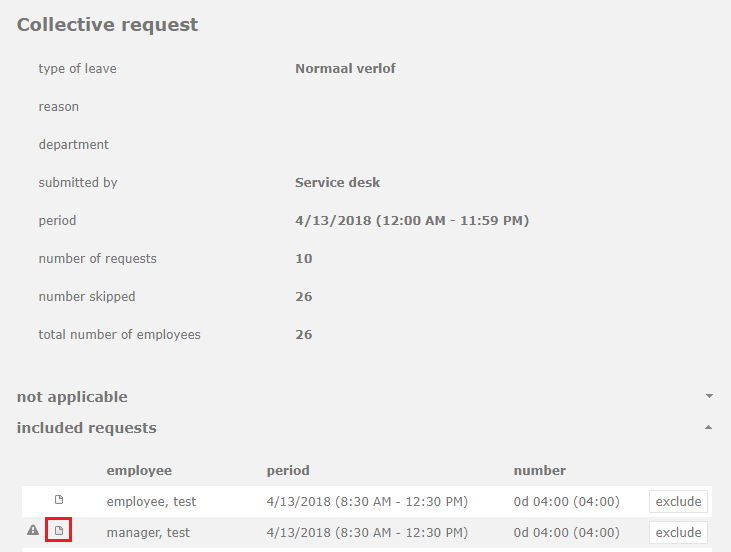
This conflict can easily be solved by clicking on the detail next to the exclamation mark. In this screen, you will see which employee has a conflict. Again, select the detail next to the exclamation mark.
In this screen select “solve conflicts”. The conflict analyzer will now automatically fix this request by adapting the request to the schedule which is now relevant to this request.