Click here to read more about Teamplanner.
Click here to read more about using a customized calendar.
Click here to read more about setting a notification when capacity utilization is below minimum.
Teamplanner: creating/editing a team for Custom Calendar
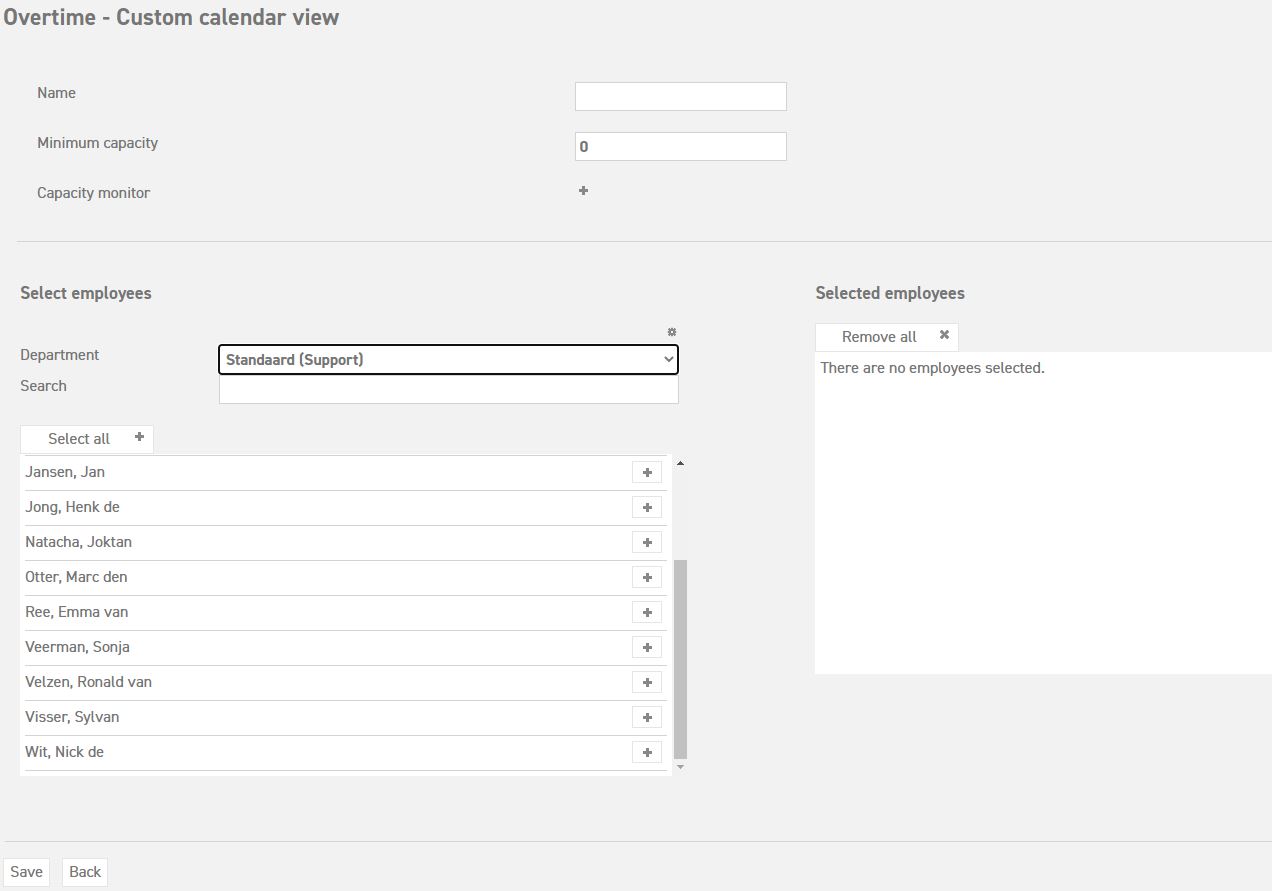
The administrator can create one or multiple teams, by going to ‘Settings (gear icon top right)’ ⇒ ‘Master data’ ⇒ ‘Custom calendar view’ and select ‘Insert’. Give the team a name and search for employees (by clicking the small gear icon under ‘Select employees’), based on name or department. Use the + button to add them to the calendar.
The options ‘Minimum capacity’ and ‘Capacity monitor’ are also available here. Read about these options and how to use them here.
Press ‘Save’ and the team is added to the overview of teams that can be used for customized calendars. These teams can be linked to employees, so that he or she can view this customized calendar in the calendar summary. You can create any number of teams.
Teams can also be changed at a later date.
Allocate a Custom Calendar to a user
The calendar view can be linked to multiple employees and managers, so that you can view combined departments/employees in the calendar summary. This way, you can decide which employees can view which teams in their calendar summary, and grant multiple managers access to a the calendars of a predetermined group of employees.
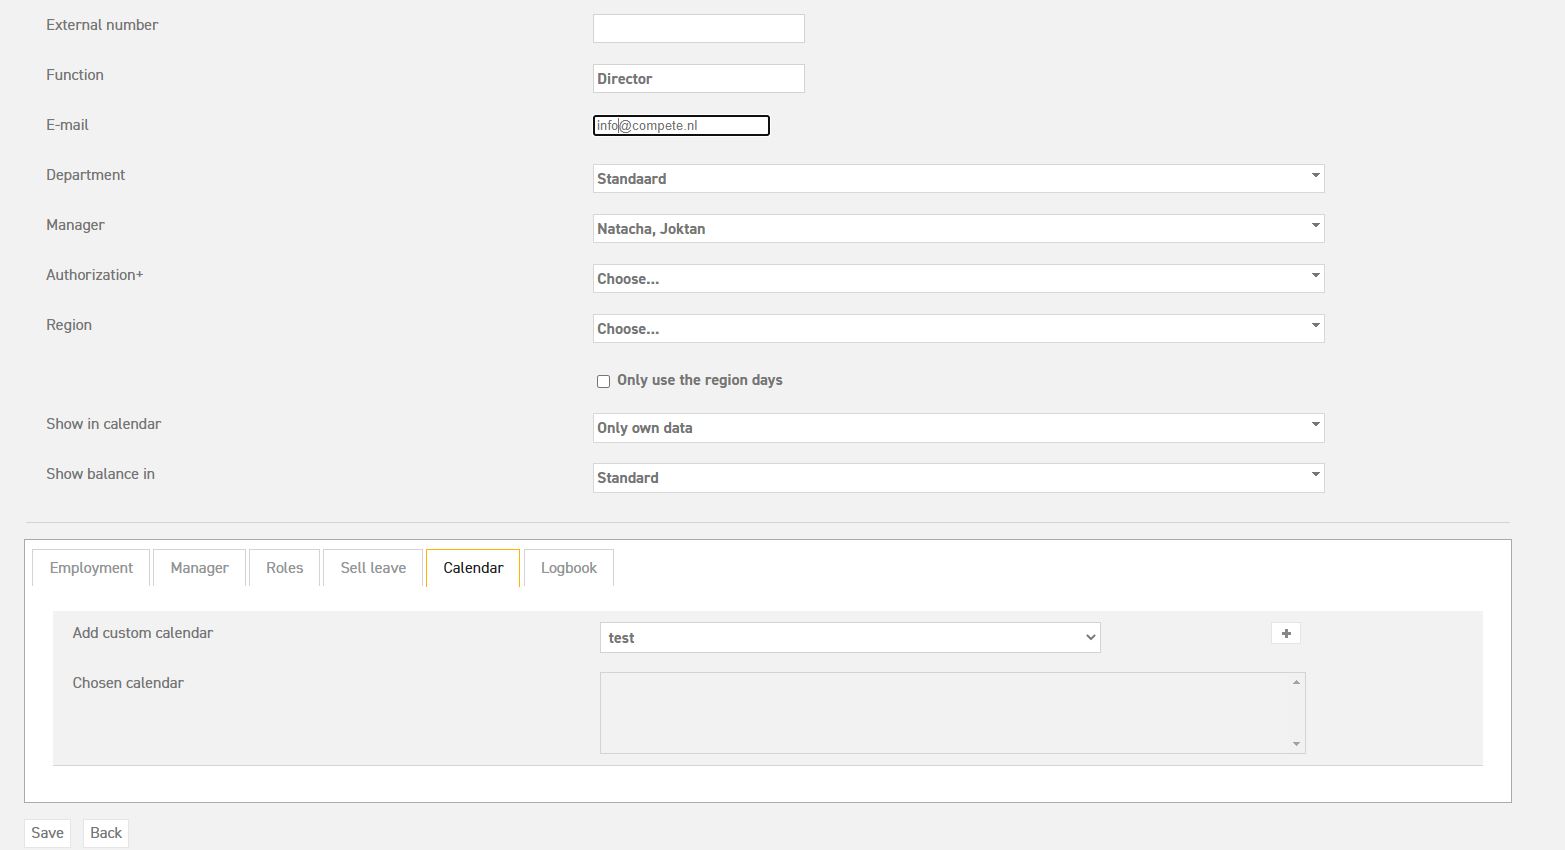
Go to ‘Settings (gear icon top right)’ ⇒ ‘Users’ ⇒ ‘Overview’ and look for the employee for whom the calendar was designed. To edit the employee, select the pencil icon. Then select the ‘Calendar’ tab at the bottom of the screen where the different teams can be selected. Other than the standard calendar, you can now also select one or more customized calendars.
Click ‘Save’ to add the calendar to the employee’s account.
Click here to read more about Teamplanner
Click here to read more about using a customized calendar.
Click here to read more about setting a notification when capacity utilization is below minimum.


