
Add user
As an administrator, it is your job to manage users in the system. Go to ‘Settings (gear icon top right)’ ⇒ ‘Users’. In the screen that appears, select ‘Add user’.
Add a user
This option can be found at the top of the list of users. Only use this option when a new user is entered into the system. Attention! When a user is added, it is also necessary to know which employment and schedule will be used for the user.
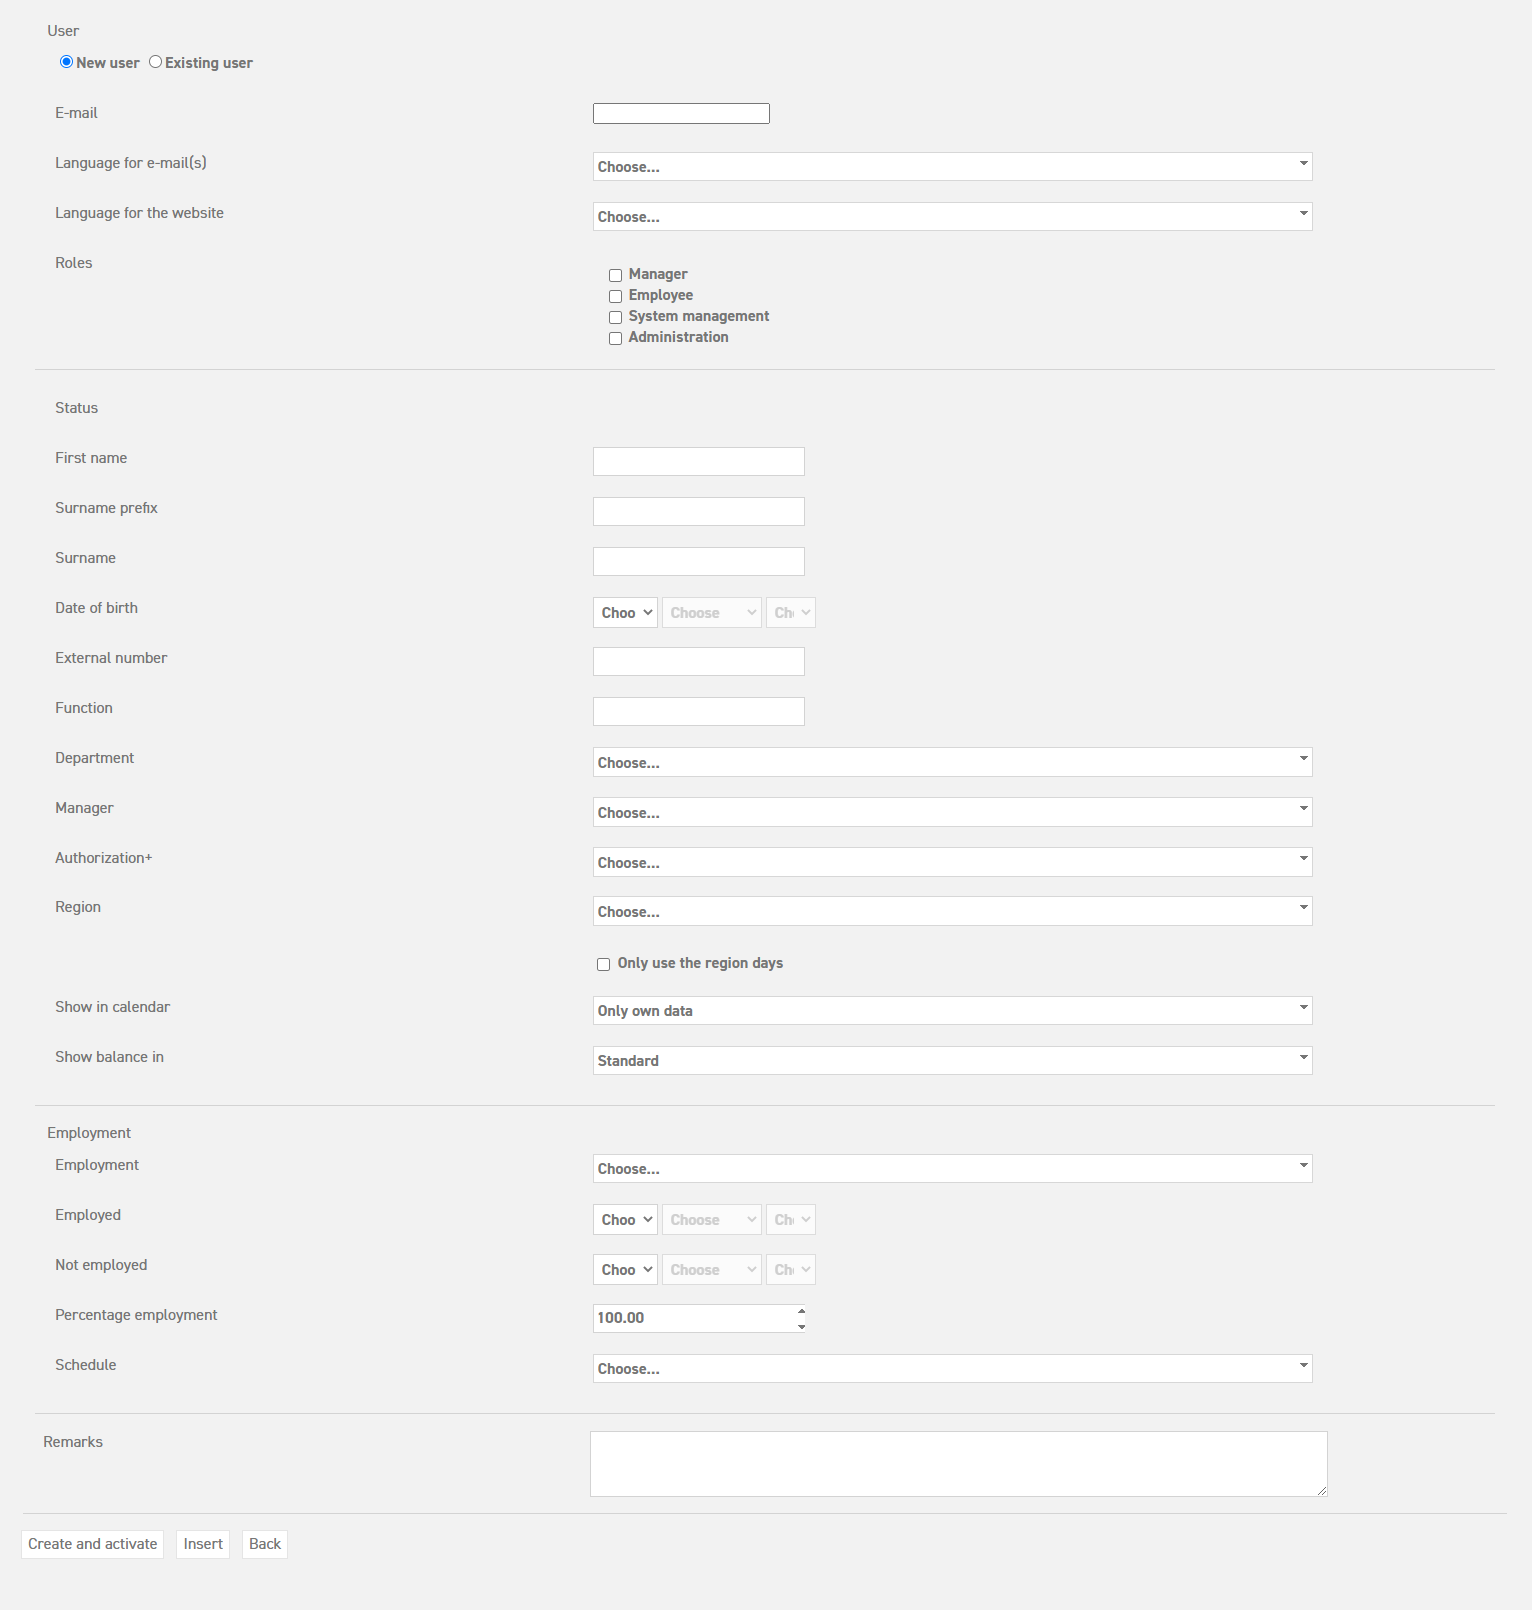
The screen above will appear when you select ‘Add user’. The following items should be entered into the system:
- E-mail: This e-mail address will be used for sending the users transactions and requests.
- Language for e-mail(s): Select the language that will be used in the e-mails. The selected language can still be changed by the user later on, in his or her profile.
- Language for the website: Select which language will be used by the user within the application. The selected language can still be changed by the user later on, in his or her profile.
- Roles: Here, you can select the roles that apply to the user. ATTENTION! it is possible, and necessary, to select multiple roles. For instance, a manager who has to decide upon requests for leave of his employees, but who will also receive leave himself will have the role of employee as well as the role of manager. If that person is also authorized as an administrator, the roles of employee, manager, and administrator will have to be selected.
Follow this link to learn more about user roles. - First name: Enter the first name of the user here.
- Surname prefix: Add the surname prefix here, if necessary.
- Surname: Enter the surname of the user here.
- Date of birth: Enter the date of birth of the user here. This date will also be used to calculate the amount of senior days he or she will receive.
- External number: If you company uses employee numbers, the users can also be linked to this number, so that you can easily search for a user in the system according to the external number. It is not necessary to enter anything here when adding a user to the system.
- Function: Enter the function the user has within the company. This will be shown on the exported user list. It is not necessary to enter anything here.
- Department: The new user has to be linked to a department, so that he or she will also be shown in the department overview.
- Manager: Select a manager for the user. All users with the role of manager will be shown here. The chosen manager will decide upon the requests of the user.
- Authorization+ (module): Select the authorization flow that should apply to the request process of this employee. The dropdown menu will contain all authorization flows that are linked to the type of leave ‘all’.
- Region: You can select a different region for the user if he or she has different (national) holidays in his region. These days will first have to be added to the regions in the system. Click here to read more about regions.
- Show in calendar: Here, you can select whether you want the user to be shown in the calendar. For most users, it is advisable to use this option. In the case of users who are not relevant to be shown in the calendar, you can choose not to use this option. For instance, this could be security, cleaning service, etc.
- Show balance in: Here, you can select how the balance will be shown in overviews (days, hours, days and hours, decimals). If you have already added your preferences for the specific types of leave, you can select ‘standard’.
- Employment: From the drop-down bar, you can select an employment from those which have been added to the system. Select the employment that should be linked to the employee. The amount of leave days the employee will receive depends on the amount of leave days that are predetermined in the employment. A different employment could then result in a different leave balance. The employment should always be based on a full time CAO.
- Employed: Enter the date the employee enters employment here. Attention! This date will be used in the calculation of the amount of leave days the employee will receive for the current year, as well as the amount of seniority days the employee will be entitled to.
- Not employed: It is not necessary to enter a date here. In case the end of contract date is already established, it is advisable to enter it here. Only do this if you are sure. When you enter a date here, the amount of leave days the employee is entitled to will be calculated according to the contract.
- Percentage employment: Enter the percentage the employee will work as compared to a full time employment. The employee will receive the selected percentage of the employment selected earlier.
- Schedule: Here, you can select one of the schedules that were entered in the system from a drop-down bar. Select the schedule that will apply to this employee. The schedule will be used by the system when (collective) requests are made. For instance, when a request is made for a day which is empty in the schedule of the employee, the request will not be applied to the employee, and he or she will not lose any leave balance. Are you also using the time registration module? If so, this schedule will also be applied there.
- Remarks: Any remarks can be added here, if necessary. It is not obligatory to enter anything here.
When you are sure you have filled in all the data correctly, you can select ‘Create and activate’, and the user will be added to the system. As soon as a user is entered into Leavedays, this person will receive an automatically generated e-mail, containing a explanation about his/her account. In the e-mail you can also find a link that redirects you automatically to the registration page of your system.
When you want to add the user without activating him/her already, you can select ‘Insert’. This can come in handy when the user will begin in a later stage.
ATTENTION! When you delete (and afterwards re-enter) a user, all requests the user has made will be deleted as well. When a user leaves your company, you should not delete him or her (to keep your financial registration in order). It is better to make the user inactive than deleting them entirely. An unlimited amount of inactive users are allowed to be in the system free of cost.
Read more about making employees inactive here.
Read more about deleting employees here.